06/05/2019

Cheers for Memory Maze


Hey Everyone 

Here is my latest layout 
I'm slowly working my way through the wedding photos (it will be their First Wedding Anniversary on the 18th of May lol)
I love this photo of the girls, I better do some of the boys soon though

Make sure to check out the rest of the Memory Maze Blog for loads of inspiration and check out what's new


I had this Wine Glass Chipboard in my stash which was perfect but I didn't want to paint it like I always do so the paper range from Prima I used had this paper in it which is so pretty so 
I glued it to the chipboard waited for it to dry then used a knife to cut around it

I then used some Art Alchemy Wax inAged Brass around the edge to get rid of the chipboard colour to finish it off 

I added a few feathers for something different over the top of the vellum sheet that came with the matching flowers and feathers

 One of the Prima papers has a foil print on the paper so I hand cut around it to make a frame
The little white flowers were out of one of the Prima packs 

One of the Prima sheets of paper had different sized shapes on it and I cut a few different piece from that to lay under the glass and the added another flower 

I then used the Finnabair Art Ingredients Glass Glitter in Copper randomly over the page for some sparkle  

These flowers I got from a cheap shop and added some glass glitter too as well


Memory Maze Product I used


Thank you for visiting I hope you visit again soon x


Trinket Box for Colour Blast


Hey Everyone

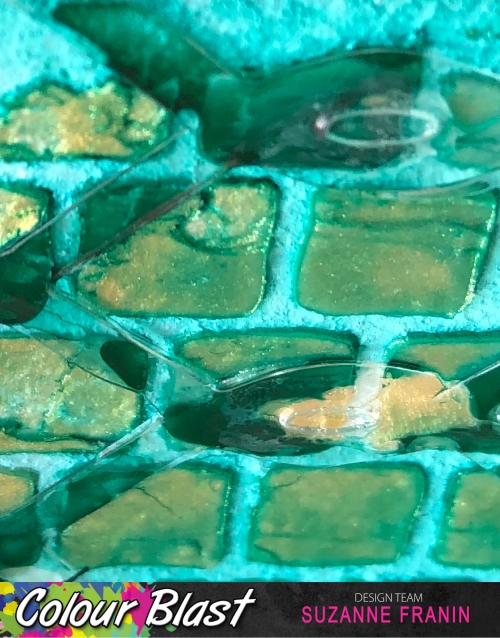
My project for the Colour Blast Blog is a little Trinket Tin, good to keep earrings or jewellery in when you take it off at the end of the night

All the products I used you can find here as well as a list of suppliers on the Colour Blast Website 


I used 1 layer of the Colour Blast Heavy White Gesso with a sponge - I like the texture it gives 
Sometimes I like use a brush for a different texture depending on what I'm doing over the top of it

I love this Colour Paste Bling it's so bright and shiny and looks great through this stencil
Colour Artist Inks Lollipop (I had an oops the other day and didn't close the lid properly so luckily I always have muslin on hand to mop any spills LOL) It was perfect for the pop of colour this project needed
Colour Shimmer Dust Peacock I added a bit of the powder to my board then added as much water as I wanted the colour to be - darker or lighter
I thought would go well with the Colour Lollipop Artist Ink and the Colour Paste Bling for the face
Dorland's Wax Medium I used over the top of the face to add something extra it gives it a sheen different to the shine that the shimmer dust does


Colour Artist Inks Peacock I used to paint the tin - the plain white gesso looked a bit boring but unfortunately we lost the shimmer of the Colour Paste Bling

Graffiti Grunge Collection Linked in Die I cut it out in acetate so it's a bit hard to see (I did have to put it through the die a few times)


Thank you for visiting and I hope you come back soon x

03/05/2019

Maid of Honour for Creative Artiste Mixed Media Challenges


Hey Everyone

I love these heart canvases and this photo is so beautiful of my daughter and her Maid of Honour 
The photographer captured a glow in their faces it's just gorgeous
So I started off by using the Rosy Stencil over the whole background 

Then I painted the canvas with the Art Alchemy Red Wine
I used the Art Alchemy Metallique Wax in Old Silver with my finger rubbing it lightly over the top which looked great 

But then I decided to use the Prima Midnight Garden products and they have a copper colour foil on a lot of the pieces so I went over the canvas with the Rich Copper wax but I'd put too much so I brushed it again with a bit of the Red Wine and ended up with this colour 

I added the bow then arranged the chipboard stickers and some of the Journal Cards after I stamped randomly with the Paint Chips Clear Stamp


 Before I added the photo I added some muslin over the cardboard that I used to raise the photo up

 I added the flowers they matched perfectly with the ones that the girls had in their hair and bouquets 


Make sure to check out the Blog and enter the Challenge


Thank you for visiting I hope you will be back soon x

New Team - Embellish With Flair

Hey Everyone

I have been lucky enough to have been chosen to be on the Embellish With Flair team 
I'm so excited as besides flowers I LOVE Flairs


They have such an awesome range of Flairs so make sure you visit the STORE and I get to play with them 

Make sure you visit the BLOG to check out who else is on the team and check out what we create 

Thank you for visiting and I hope you will come back soon x


27/04/2019

Fairy Sophie for Memory Maze


Hey Everyone

For my project this week I've chosen a photo of my Goddaughter from a few years ago in a fairy costume I had some Memory Maze chipboard Fairies just waiting to be used when I remembered this photo

Make sure to check out the Memory Maze Blog for lots of inspiration and to see the new upcoming designs
We are also on Facebook and Instagram so make sure to check us out on social media as well


I painted the fairy using the Finnabair Art Alchemy Paints Metallique Rustic Brown, Wild Fuchsia, Pure Sunshine, Fresh Orange, White Pearl and Opal Magic Yellow-Blue


I mixed Helmar Super-Tac Glue with some glitter to cover the Criss Cross, Mini Scribble Heart I used
Here's what the heart looked like when it dried


I added some extra colour with Colour Blast Colour Artist Inks Slipper, Citrus and Spice just letting them run down the canvas and into the muslin and glitter I had added

After placing my photo where I wanted it with Helmar Acid Free Glue I stuck the Fairy into place with Super-Tac Glue after adding a flower to her hand


I added some extra embellishments for some dimension and interest  and glued the down with Helmar 450 Quick Dry Adhesive

Memory Maze Products


Thank you for visiting and I hope you come back soon x

22/04/2019

Happy for Colour Blast


Hey Everyone

I love shaped canvases they are so much fun so for this post for Colour Blast Blog I used a round one

Don't forget about out checking out the the Kit Club all the details are on the Colour Blast Website

This is Jack my son he's going places he has a head for business and that's what he's doing at Uni for the next five years 
He'll do any work that's thrown his way at his job 
And the only other thing he loves more than his family is the gym LOL


I started with some Colour Blast Colour Paste Steel painting it with a paint brush 

I then dripped some Colour Artist Ink in Rust (my favourite colour)

 I then used some Colour Shimmer Dust Duke which I also painted on
I then ended up painting the Colour Artist ink Rust and the Colour Shimmer Dust Duke thicker and then spreading the Colour Paste Steel with a palette knife  
I love how you can still see the canvas detail

 So here's how the canvas looks after playing around for awhile trying to get things straight LOL not a great strength of mine 
 I used Flutterbydesign Stickers to add some sayings that suit Jack 

 I added a few Finnabair Mechanicals for some contrast
In the Centre of the bottle cap I added a Melange Art Pebble which I had painted with Colour Shimmer Dust Duke mixed with 3D Matte Gel
I also used a heart from Charms Creations they have some many gorgeous shapes in so many colours
I then added Art Stones randomly to finish off the canvas


Thank you for visiting and I hope you come back soon x