Showing posts with label Gesso. Show all posts

15/07/2019

Twinkle Twinkle for Embellish with Flair


Hey Everyone

This project for Embellish With Flair was a fun little project 
Using one of the flairs from the Galaxy, Moon & Stars set 


I used Little Birdie Embossing Texture Paste Aquatini through the stencil then once I heated it so puffed I went over the whole thing with black gesso
After that I used Finnabair's Art Alchemy Sparks Raven Black paint over the background

 Then brushed some Finnabair's Art Alchemy Sparks Unicorns Hair paint over the embossed area and painted the stars with it as well
 I used Finnabair's Art Alchemy Dragons Eye paint over the metal moon 
I used a Tim Holtz sticker onto to add an extra touch
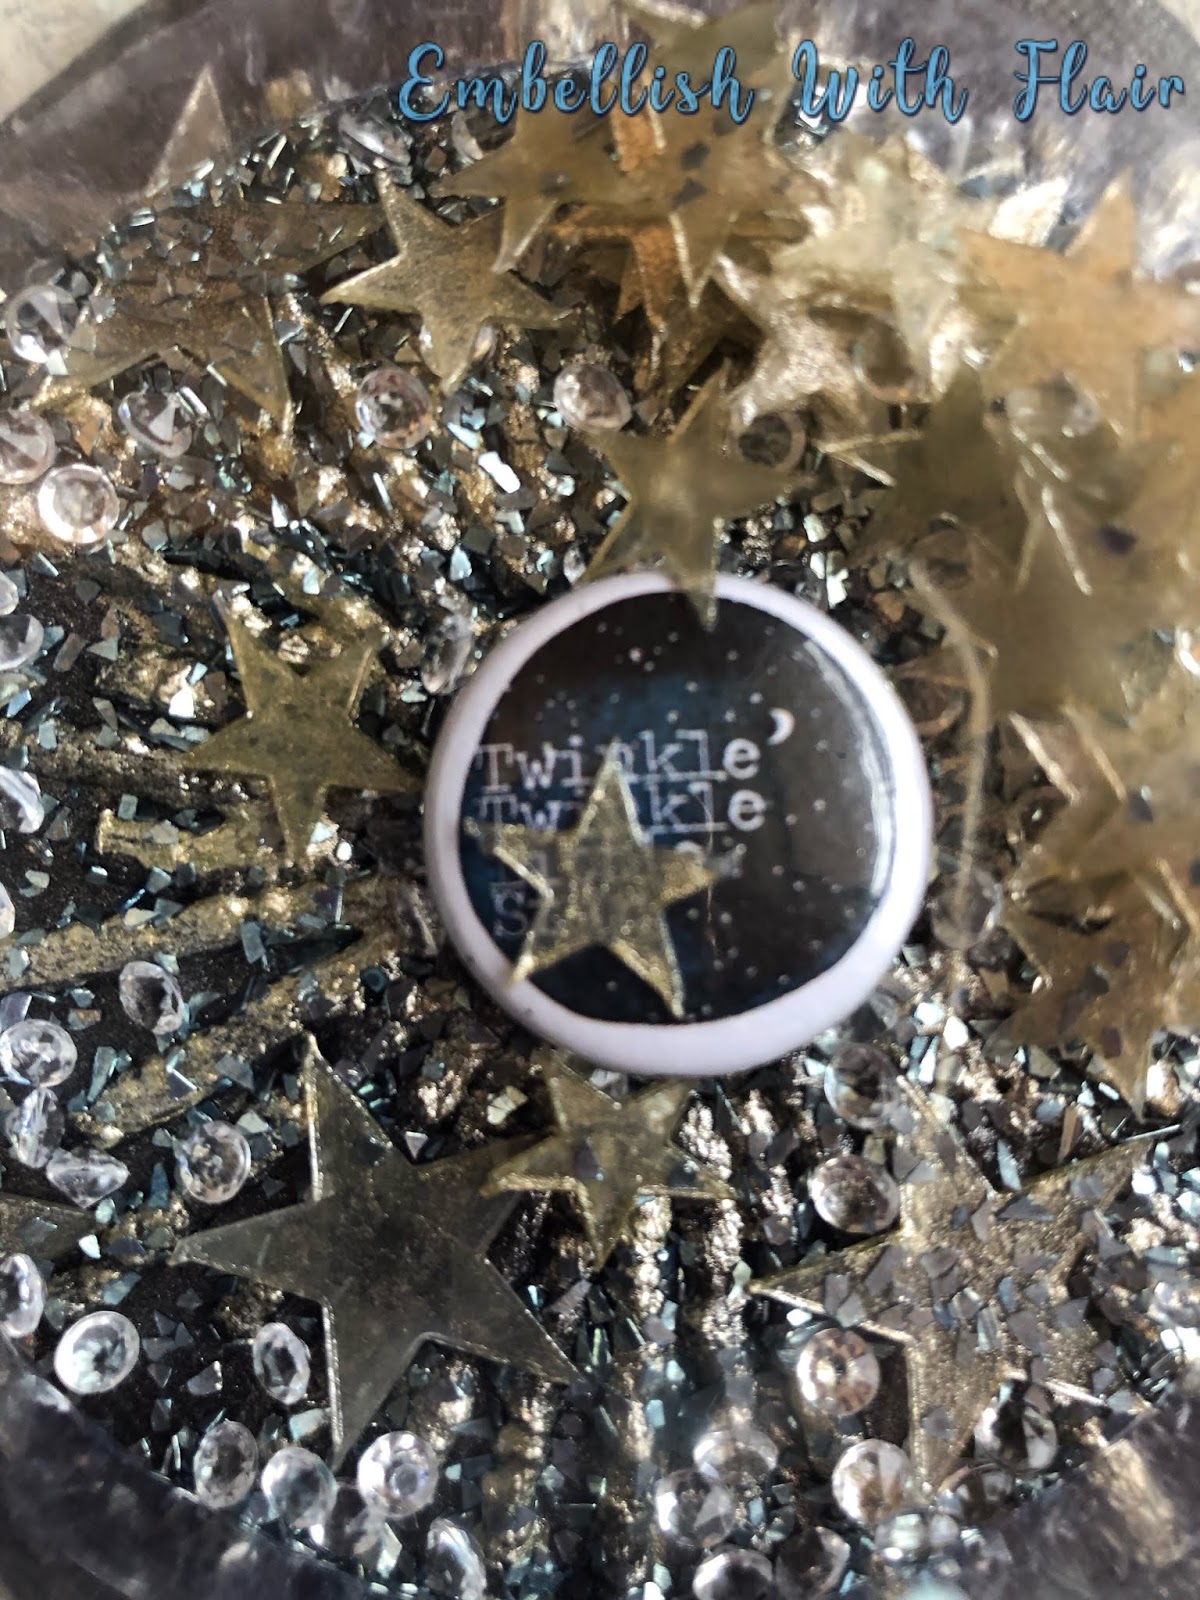
 Inside you can see the clear plastic stars which are from Memory Maze 
I added some clear gems I had in my stash and to pick up on the blue in the flair I added some Art Ingredients Glass Glitter in Platinum
Here you can see all the bits that make it like a shaker box but it's going to get hung up so it all sparkles


From the Store


Thank you for visiting and I hope you come back soon x

24/06/2019

Gift Box for Embellish with Flair


Hey Everyone

This project for Embellish With Flair I had this box that I thought I would make into a nice gift box for a bracelet or watch, I have a few birthdays coming up so I'm sure it will come in handy


I then used Colour Blast Boho Mandala Stencil with 3D Matte Gel
 I painted the box with black gesso first to make sure any other layers would adhere to the box and then painted it with a different colour gold which I didn't like

 So then I painted it with one of Finnabair's Opal Magic Art Alchemy Paints - Yellow Pink which as you can see parts show up pink and yellow on the box 

 But on the paper clay embellishments that were painted with the black gesso only, they came out mainly pink
I love how these paints work

 This set of Flairs are one of my favourites they are just so pretty and can be used on almost anything and I thought it was perfect for a gift of any sort really - I could keep it for Mothers Day even

 I glued the paper clay bow to the twine so it can be taken off without having to ruin the box
 And as always there has to be a flower x


Embellish With Flair Products I used


Thank you for visiting and I hope you come back soon x

17/06/2019

Farm Help for Colour Blast


Hey Everyone

Here's my latest project for Colour Blast Australia 
Make sure you check out the latest products from the store
And make sure to check out the Blog as there is always lots of inspiration from the fabulous Design Team there

I got these photos of my gorgeous God Daughter from her day at school where they dressed in farm type clothes to support the farmers and donated money towards it as well
She's not shy when having her photo taken if you can't tell 


I started by spreading Heavy White Gesso over the Spread Your Wings - Earth Angels paper to mute the black a little and for the  Lush Colour Shimmer Dust to stay on top of the paper and not soak through (that's what happens if you don't prime your papers)


I sprayed water onto the paper then dipped a brush into the Shimmer Dust, then lightly tapped the brush randomly over the page
Then with the spatula I spread the water and dust so it would mix and leave different shades over the paper


Here you can see I used different pieces of the Spread your Wings Collection and added the Lush Shimmer Dust to those as well
I had excess on the page so I swiped them onto it so they all got a bit of colour

I had planned on using these flowers on something else and had used the Soot Colour Artist Ink on them but had added extra water to tone them down then in the end didn't use them 
So I added more Soot to them and placed them on the page


I added some straw to give the farm feel and add some texture
And of course every layout needs some metal 
I also added some word stickers that I thought where just right for the photos and for Miss Sophie xx


Thank you for visiting I hope you come back soon x

03/06/2019

You & Me for Colour Blast


Hey Everyone

This week's Colour Blast project I HAD to use the new stencil I'd gotten Colour Blast Boho Mandala Stencil from the Follow Your Dreams range it's so pretty  

Make sure you check out the Shop for the latest releases and the Blog for all the inspiration you need from the talented Design Team
Also, check out our Stockists for our range of products and help out a small business

Look at these two how gorgeous are they 
Mum took them to one of those pop-up shops where they take the pictures in the shopping centres and had a whole heap of photos done and when I saw them I asked if I could do a canvas of one of the photos she said for sure not knowing what I was going to do
It was so hard to pick as there were so many of them together and apart but this was the most fun out of all of them
And lucky for me their mum loved it

 I used the Colour Blast White Heavy Gesso on all the embellishments and the canvas to prime everything so that whatever medium I was going to use on them would adhere with no problem  
I used the Colour Blast Boho Mandala  Stencil from the Follow Your Dreams range with some clear impasto
I'd have to say this is my new favourite stencil it's so pretty
 

With the background, it took a while to work out what colour to go with I was going to do it in Snow White Shimmer Cube but the Lady I made it for said the other colour she liked was purple (she hadn't seen what I was doing with the photo until I was finished)
So I used the Colour Shimmer Cube Royalty 

 I used the Colour Artist Ink Slipper and some water for the flowers as they weren't white and didn't look right 
I also used it on a few of the other embellishments

 I used a Flair from Embellish With Flair it's from the You Make Me Smile Set
I also used some Cocoa Vanilla Studio Happiness Accessory Stickers and Die Cut Ephemera set
 The Heart is from Finnabair and I filled it with some Silver Art Ingredients Glass Glitter and used a Cocoa Vanilla Studio saying sticker from the Happiness collection to put on top same as I did with the saying on the arrow
The chipboard arrow is from a Memory Maze Set Arrow love me and you


Thank you for visiting and I hope you will come back soon x

25/05/2019

Paint Palette for Memory Maze


Hey Everyone

For this weeks project for the Memory Maze Blog I used a paint palette
Make sure to check out the rest of the Design Team's work there is so much inspiration on the Blog
I love mixed media (if you didn't already know that about me)
I love the layers and the textures and how abstract it can be 
There doesn't have to be a theme it can just BE

 So with this palette I added some things that I loved and I loved the way they looked together


I used the Paint Brush Stencil
I started with painting the palette with black gesso then adding the brushes stencil with crackle paste
Once that dried I started adding things, Memory Maze ChipboardEmpty Mason JarsChicken Wire LargeBackground Grid Trellis, flowers, metal, muslin, paperclay shapes, different shaped and sized frames, art stones and a light bulb 

I then painted it all with black gesso


I then used Finnabair waxes in a few different colours over different parts and the very end I used the gold for the final touch and glitter glass to finish it off because you always need a bit of sparkle


Memory Maze Products I used


Paint Brush Stencil


Thank you for visiting and I hope you will be back soon x