Showing posts with label prima wax. Show all posts

03/05/2019

Maid of Honour for Creative Artiste Mixed Media Challenges


Hey Everyone

I love these heart canvases and this photo is so beautiful of my daughter and her Maid of Honour 
The photographer captured a glow in their faces it's just gorgeous
So I started off by using the Rosy Stencil over the whole background 

Then I painted the canvas with the Art Alchemy Red Wine
I used the Art Alchemy Metallique Wax in Old Silver with my finger rubbing it lightly over the top which looked great 

But then I decided to use the Prima Midnight Garden products and they have a copper colour foil on a lot of the pieces so I went over the canvas with the Rich Copper wax but I'd put too much so I brushed it again with a bit of the Red Wine and ended up with this colour 

I added the bow then arranged the chipboard stickers and some of the Journal Cards after I stamped randomly with the Paint Chips Clear Stamp


 Before I added the photo I added some muslin over the cardboard that I used to raise the photo up

 I added the flowers they matched perfectly with the ones that the girls had in their hair and bouquets 


Make sure to check out the Blog and enter the Challenge


Thank you for visiting I hope you will be back soon x

24/12/2018

Challenge Project for Art and Soul Studio

Hey Everyone

I hope you all have a Merry and Safe Christmas and that you have all been good and Santa brings you all you wish for

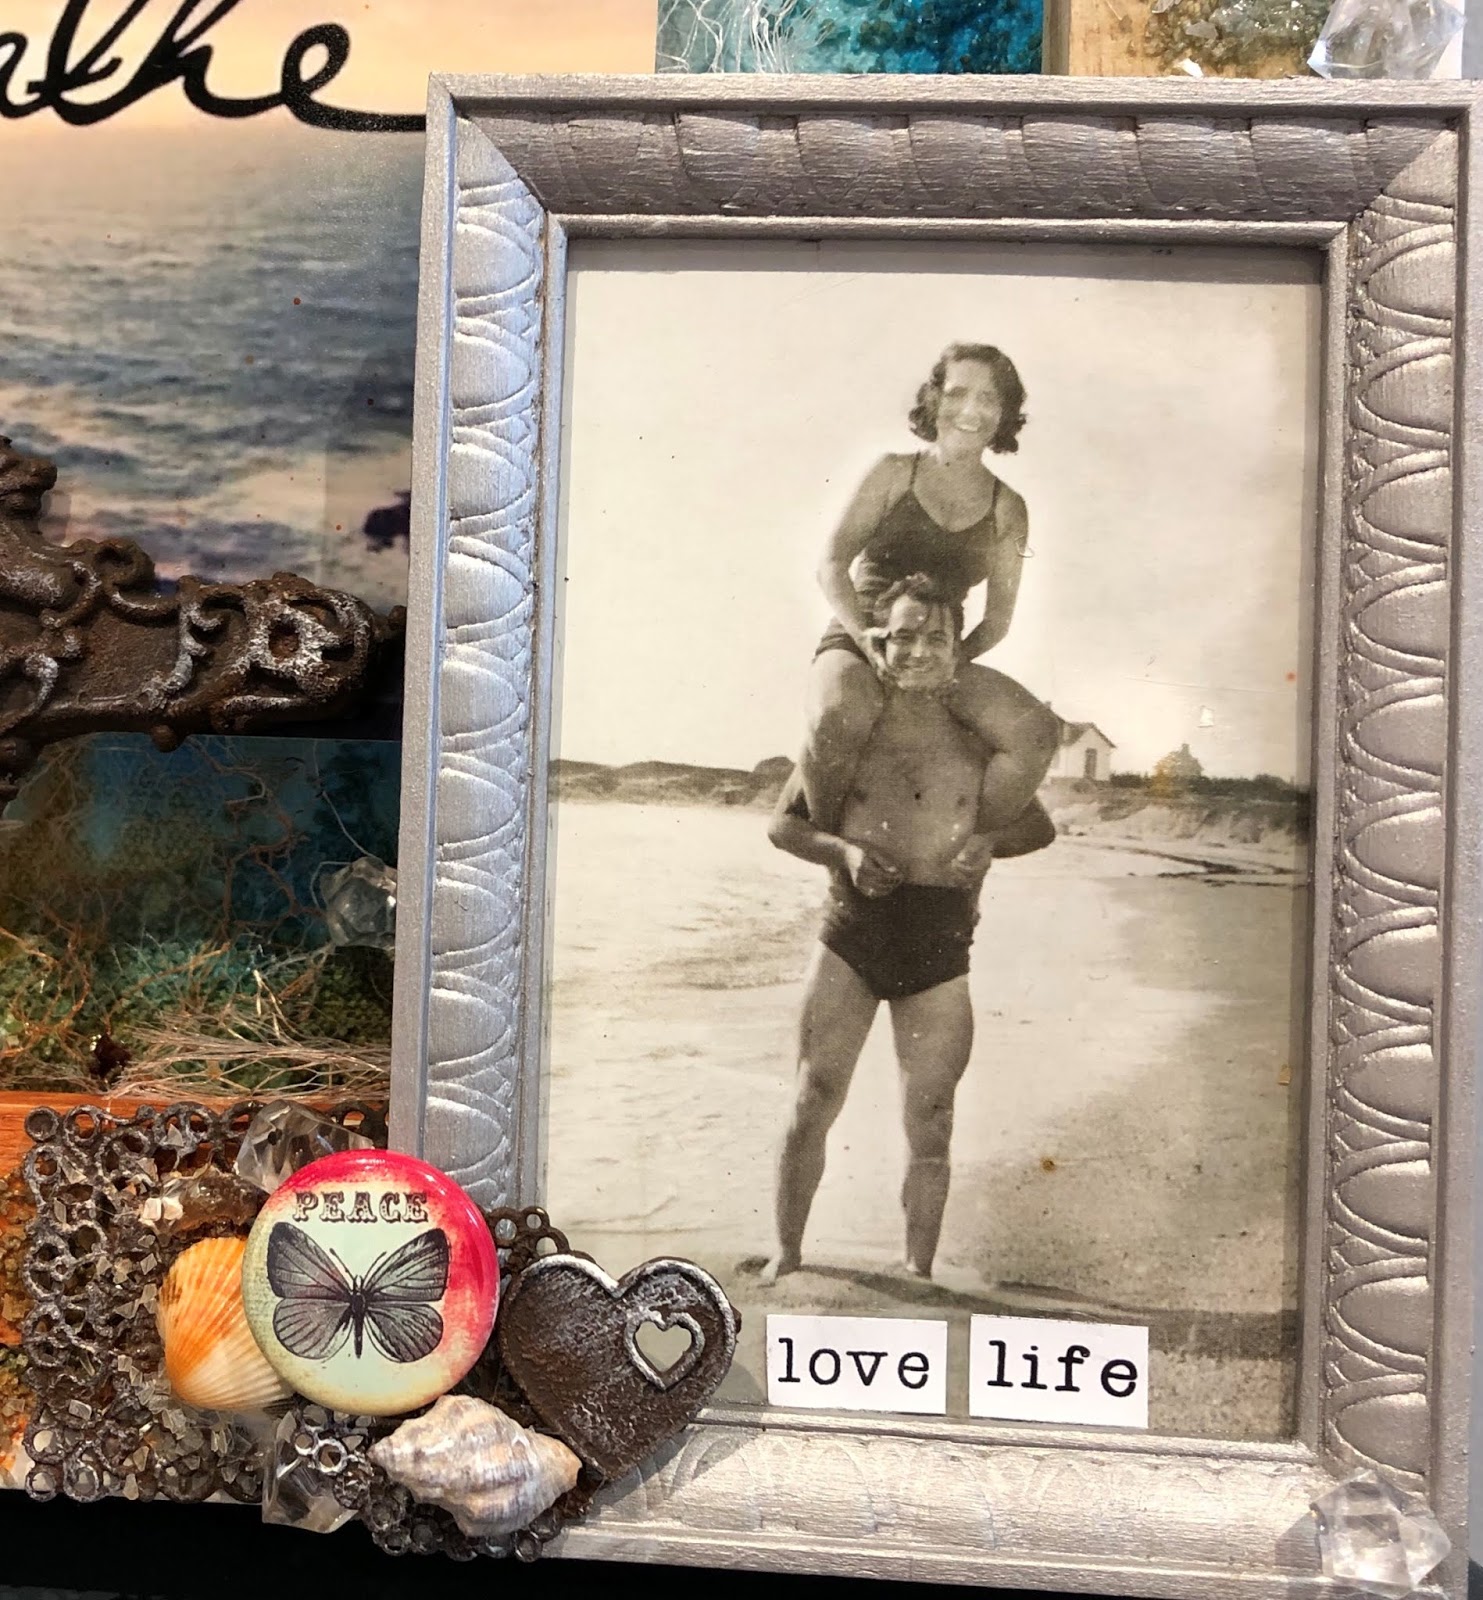
Today on the Art and Soul Studio Blog I created a beach inspired canvas as it went with my photo and it also went with our challenge photo 


The Challenge was to use the words Love Life and the pictures were there for inspiration
Make sure to enter as $50 is available for each category Cards, Layouts, and Mixed Media


So I  started off with reversing my canvas and giving it a coat of clear gesso
I then mixed in some sand and spread it around where it was needed 
I found a great branch from the garden that fit just right and stuck it down with Heavy Body Gel 


I then chose some embellishments and made them rusty using the Dark Chocolate Impasto and the Red Rust Past


With the frame I used the clear gesso before adding the Art Alchemy Old Silver wax with a stipple brush to make sure it went into all the grooves and corners


Here you can see the frame with the Old Silver was on it and the Love Life words - which is what these people look like they are doing


On the backround of the canvas I used Colour Blast Artist Ink Calypso with some water and let it run down the back making sure to get lighter and darker parts like you would see in the ocean

I also added some mesh to the cardboard I used to raise the photo up


Here's some of the embellishments I painted with the rust and a few other bits I also gave then a light brush with white gesso


Unfortunately the vellum globe I used went funny after I glued it with the gel 
And under that you can see where I used some Colour Blast Artist Ink Rust to make it look like some of the embellishments had rusted because of the ocean


I added a dragonfly because you often see them near water 
I added a couple of shells and you can see some of the clear beads scattered around the canvas


Products used from Art and Soul Studios
Finnabair Dark Chocolate Impasto
Rust Paste - Red
Tim Holtz idea-Ology 
Vignette 4 Frames  (instore)
Found Relatives (out of stock)
Ephemera Pack - Vellum
Art Basics
Clear Gesso (out of stock)
Heavy Body Gel (instore)
Art Alchemy Wax Old Silver (out of stock)
Art Ingredients Glass Glitter (out of stock)
My Stash
Colour Blast Artist Inks Calypso and Rust
Sand
Metal
Shells
Tree branch
Flair Button
Plastic beads


Thank you for visiting and I hope you have a Happy and Safe Christmas and New Year x

12/11/2018

Love for Art and Soul Studio


Hey Everyone 

This is my first post with Art and Soul Studio and I'm so excited to be here
Make sure you check out the Store for all the awesome products and the Blog for the fabulous projects that the Design Team create


I started off by using clear gesso over the paper then cut out one of the circle it has words of love on it
I then used some Helmar Tacky Craft glue and a scrap of cardstock to cover the whole as I wanted to raise to cut out piece up with some cardboard
I then glued the cut out circle to the Petite Resin Round Frame
I then used the 3D Matte Gel through the Bohemian Bazaar stencil randomly over the 13 @Arts paper
I painted the Colour Blast Leather Colour Shimmer cube over the stencilled areas and then over all the circles


I painted my paper clay piece with the Leather shimmer cube


 I poured some of the Patina powder out and added water to make a paint
It made it look old which is what I wanted
I then rubbed some of the wax over the top of the clay just enough to get the parts that stood out


I then used the pink and painted the paper clay flowers the same way


I tried a darker wax but it didn't look good so I used a wipe and it came off 
I liked the look of it as it was so I left it that way
I used the Leather Shimmer Cube to paint the frame as well and rubbed the brass wax just over the flowers


Before glueing the embellishments down I used the muslin down across the paper making sure to hide the hole that I'd cut out


I glued the bling into the centre of the spoon then glued the pebble to the top of the bling once they were stuck together I glued them down


I covered the metal word with the brass wax as well and then glued it to the paper clay 


I then placed the other embellishments down on the muslin once I was happy with everything I added the Art Stones randomly over the page


Products I used
Frank Garcia Artisan Powders - Antoinette Pink and Trianon Patina
Prima Frank Garcia Memory Hardware Resin Frames 2/Pkg: Petite Round (sold out)
Prima Moulds (Sold Out)
 Mould 2.5"X3.5": JOIE
Mould 2.5"X3.5": Fleur
Mould 2.5"X3.5": Woman
Finnabair Art Ingredients Melange Art Pebbles (Sold Out)
Finnabair Art Stones and Mega Art Stones (Sold Out)
Finnabair Art Basics 3D Matte Gel (Sold Out)
Finnabair Metallique Wax Aged Brass (Sold Out)

Bling, metal love wordand muslin from my own stash


Thank you for visiting and I hope you come back soon x

08/08/2018

Radio for Helmar

Hey Everyone 
I was given two old radios by my dad and couldn't wait to use one the other I couldn't bring myself to use it's to old and vintage looking and I think I'd like to just clean it and have it on display 
The one I chose is on old GE which you could use with your TV and had an antenna that you used with the TV as well I didn't bother using that
I videoed the whole process so here's the linkto my YouTube video
 

So I started off by pulling the radio apart and taking the whole inside out, then pulled all the parts off - all the wires, batteries, everything off the. circuit board Wow a lot of work goes into making an electrical product
I painted the radio with some Rusty Paper paint which I was going to make it all grunge and rusted looking but after glueing the parts onto the radio I changed my mind
There was too much detail in all the little bits and I liked the look of the different textures and details they had so I kept them that way
I mainly used the 450 Quick Dry Adhesive on everything as I hate waiting for things to dry and wanted to get things stuck LOL
I also added some Memory Maze Thistle Flowers for a different texture

I decided I wasn't happy with the Rust colour so I used some Aged Brass Art Alchemy Metallique Wax with a bristle brush over the whole radio and a little over some parts but not enough to cover them


Then for something different I added some Colour Blast Colour Bling Paste


Using a Stencil Girl Stencil - Go your own way Arrows by Mary C. Nasser

Well I hope you like my Radio I had a lot of fun doing this project

Thanks for visiting and I hope you will be back soon xx

10/07/2018

Picture Perfect for Memory Maze

Hey Everyone

My turn on the Memory Maze Blog so make sure you stop by and check out the other Design Team members creations and see what else is happening with the latest creation of Chipboard and other awesome products or check out the Facebook page 


Today I created a frame with a picture of girl from a magazine which I fussy cut out and decorated it with a few bits and pieces from my stash just for something different


I painted the frame with black gesso then with some graphite texture paste I used the Door Wire Stencil over the background of the frame (I took the glass out and put that aside as I don't use that)


I then used some Linda's Magical Shakers - Alpine Ice Rose, Grab a Guy GoldCowabunga Copper and I added a little bit of the Creme Brûlée Cream from the Sweet Treat Shimmer Set but I wasn't happy with that so that got covered up


I used the 2nd largest flourish from the Flourish Corner Set and covered it with Finnabair Art Alchemy Antique Brilliance Red Amber Wax and wasn't happy with it so I then went over it with some Metallique Rose Gold Wax 
I also used the Metallique Rose Gold Wax over some of the metal embellishments

With the magazine lady I liked the way her hair was styled except there was writing in it so I went over it with some brown paint and tried to follow the way it was styled with the brown paint
Then when I was glueing her down I added a bit of tissue under her hair to give it some dimension
I glued the flourish to her hair like a tiara and added a metal embellishment and some pearls


I then added my embellishments to the corners of the frame a few metal pieces a couple of velum flowers, a flower that I have had forever and it was perfect with the rose gold flourish that I used on her hair


I gave her a drop pearl and diamond earring


When I was happy with everything I added the Colour Blast Clear Shimmer Brush Marker to her face so she has a gorgeous shimmer to her


I also added it to the vellum flowers and butterfly - it gave them a more transparent look

Memory Maze Products I used -


Thank you for visiting and I hope you come back soon xx