Showing posts with label vintage frame. Show all posts

27/02/2019

Today for Memory Maze

Hey Everyone 

This was a fun little project for the Memory Maze Blog with colour but also my favourite rust and owls

Make sure you visit our Facebook page so you don't miss out on anything new


I started of with the Door Wire Stencil and some crackle paste on a mini canvas I set it aside to dry on it's own as it has ha better crackle when you do this

Once the background was dry I used some Colour Blast Colour Artist Ink in Citrus, Slipper and Spice
Dripping the colours down the canvas and adding a little water to spread the colour over the whole canvas

Then with the 2 piece vintage oval frame I painted it with some brown acrylic paint then some Rusty Paper Paint dabbing it randomly then I added some Frank Garcia Memory Hardware Artisan Powder in Trianon Patina in random spots


I cut 2 of the outer Hearts a pair so they sat in each other then used the Artist Inks again to paint them 


I painted the flowers behind the owl with the citrus as it needed some more brightness behind the owl
The owl I used Frank Garcia Memory Hardware Artisan Powder in Umber, Clay and Black and mixed in a bit of Colour Blast Colour Spray Mocha and the leaves I used the Grass Artist Ink

From the Globes set I took the little vintage timer out and painted it with Artisan Powders and then a bit of the Mocha Colour Spray and a bit of Cobalt Shimmer Dust mixed with a fair bit of water


I added a few white flowers because you can never have enough flowers LOL


Memory Maze Products Used


 2 piece vintage oval frame


Thank you for visiting I hope you come back soon x

24/12/2018

Christmas Star for Memory Maze


Hey Everyone 

Merry Christmas I hope you get everything you dream of from Santa and share the love with everyone

Today on the Memory Maze Blog I'm sharing a Christmas project of a special little girl who I did the same sort of photo last year so this year instead of round we have gone for a star 


With the lid of the tin I used Finnabair's Poppy Red Impasto so I didn't need to prime it
I used a sponge with the paint and it gave a nice stippled affect 
I also did the same with the back
Once it was dry I added some Art Alchemy Wax in Old Silver around the edge of the lid and all of the chipboard embellishments


Here is a close up of the Silver Acrylic Deer Head it has sparkle through the acrylic it's so pretty and my little friend in the photo has a deer on her top


I needed something to flow up the side and the Lush Flourish was perfect
I also added a transparent heart, a flat pearl bead onto a metal piece 
Underneath you can see a star from Charms Creations it's so pretty it has glitter in the material


The Wings I added to a paper clay clock that mum did for me 
 along with a few other paper clay pieces that are scattered around the star
I also used some small white flowers and some art pebbles which got covered with the Art Alchemy Wax as well


I love these Bling Tutu Flowers they are so pretty and the red worked perfect for this project
they also come in a few other colours so make sure to check out the site and get your local store to get them in


Here you can see I cut the Double Heart Vintage Frame in half and used it in two places

Here I used the LOVE from the So Rad Authentic Words set of words it just fit so nice


Products used from the Memory Maze Store 


 Thank you for visiting and I hope you will come back soon x

Challenge Project for Art and Soul Studio

Hey Everyone

I hope you all have a Merry and Safe Christmas and that you have all been good and Santa brings you all you wish for

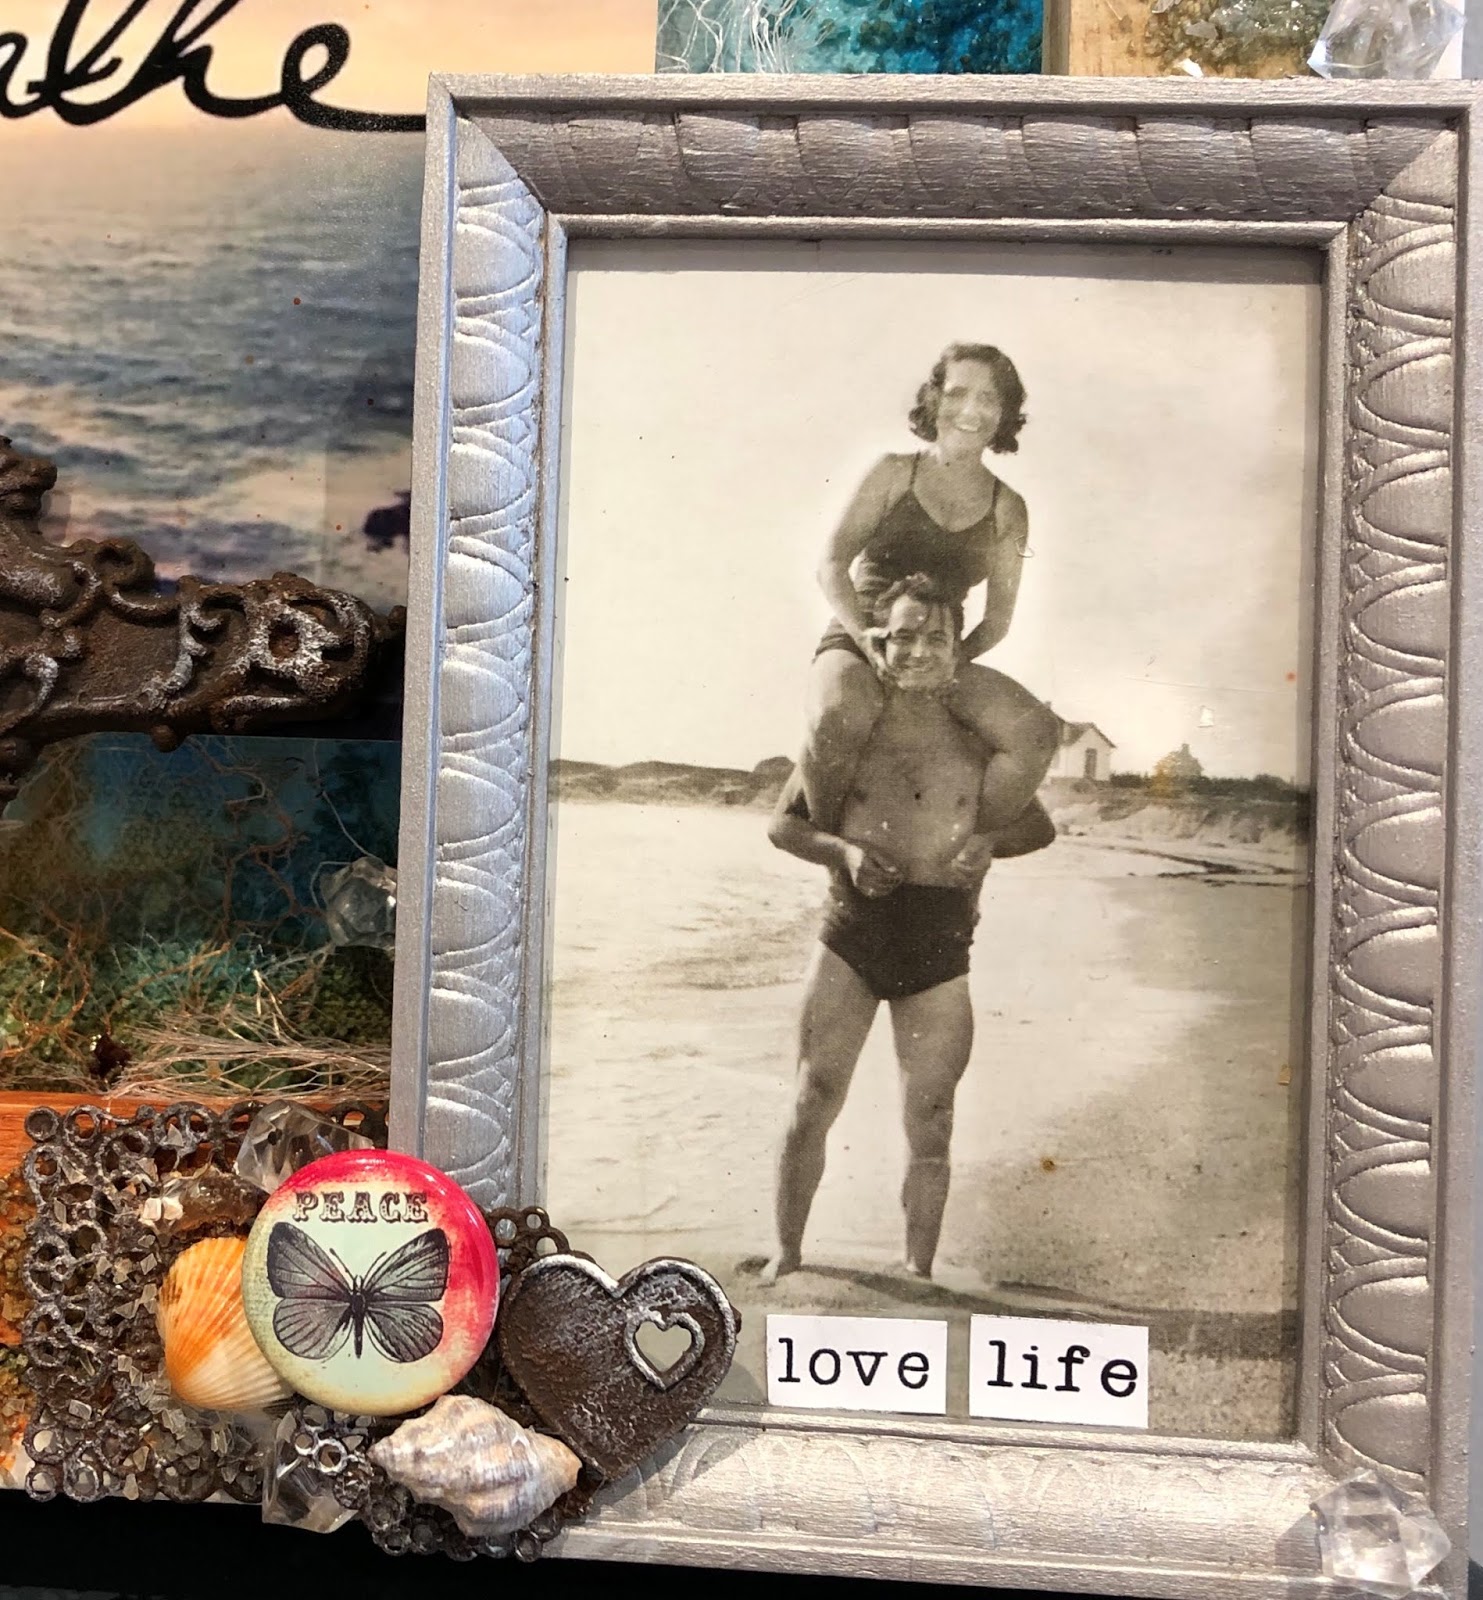
Today on the Art and Soul Studio Blog I created a beach inspired canvas as it went with my photo and it also went with our challenge photo 


The Challenge was to use the words Love Life and the pictures were there for inspiration
Make sure to enter as $50 is available for each category Cards, Layouts, and Mixed Media


So I  started off with reversing my canvas and giving it a coat of clear gesso
I then mixed in some sand and spread it around where it was needed 
I found a great branch from the garden that fit just right and stuck it down with Heavy Body Gel 


I then chose some embellishments and made them rusty using the Dark Chocolate Impasto and the Red Rust Past


With the frame I used the clear gesso before adding the Art Alchemy Old Silver wax with a stipple brush to make sure it went into all the grooves and corners


Here you can see the frame with the Old Silver was on it and the Love Life words - which is what these people look like they are doing


On the backround of the canvas I used Colour Blast Artist Ink Calypso with some water and let it run down the back making sure to get lighter and darker parts like you would see in the ocean

I also added some mesh to the cardboard I used to raise the photo up


Here's some of the embellishments I painted with the rust and a few other bits I also gave then a light brush with white gesso


Unfortunately the vellum globe I used went funny after I glued it with the gel 
And under that you can see where I used some Colour Blast Artist Ink Rust to make it look like some of the embellishments had rusted because of the ocean


I added a dragonfly because you often see them near water 
I added a couple of shells and you can see some of the clear beads scattered around the canvas


Products used from Art and Soul Studios
Finnabair Dark Chocolate Impasto
Rust Paste - Red
Tim Holtz idea-Ology 
Vignette 4 Frames  (instore)
Found Relatives (out of stock)
Ephemera Pack - Vellum
Art Basics
Clear Gesso (out of stock)
Heavy Body Gel (instore)
Art Alchemy Wax Old Silver (out of stock)
Art Ingredients Glass Glitter (out of stock)
My Stash
Colour Blast Artist Inks Calypso and Rust
Sand
Metal
Shells
Tree branch
Flair Button
Plastic beads


Thank you for visiting and I hope you have a Happy and Safe Christmas and New Year x