Showing posts with label mermaid balls. Show all posts

29/06/2019

Happiness for Memory Maze


Hey Everyone

This week on the Memory Maze Blog I created a canvas using this quote for a friend to remember to be happy for herself and not let people get to her and cause her the pain and stress 


I used Memory Maze Door Wire Stencil with some Little Birdie Embossing Paste which I got from Random Arts 
It's so fun to use, it goes on like a thin paste then when you heat it, 
it puffs - the more heat the more puff it's so much fun and worked excellent with Door Wire Stencil

I then painted it with Finnabair's Metallique Soft Satin Paint 
I went over the whole canvas with Finnabair's Opal Magic Vintage Silk Wax for an added dimension and to lighten the colour a little 

I then painted the Lace Scalloped Nested Circles clear gesso then with Finnabair's Metallique White Pearl Paint for a nice shimmer

I then used some Cocoa Vanilla pieces from the Die Cut Ephemera pack and some Mermaid Balls scattered around


Memory Maze  Products I used

Lace Scalloped Nested Circles

Thank you for visiting and I hope you come back soon x

28/05/2019

Gift Box for Helmar


Hey Everyone


My project for the Helmar Blog is a gift box made from a box that had a mug in it (I think it was a Father's Day Mug)

Make sure you check out the whole blog for the rest of the Design team projects they areas creative I'm sure you will find something you will need to make 

This is the top view as it's hard to take a view of the whole box but I really only decorated the top other than adding material to the bottom which you will see next
I painted the box with Dark Chocolate Impasto from Finnabair 
I used the Fabric Glue and an old gift card to smooth it out so there was no creases or bubbles
I also went over the box as I did each side with the clean side of the card to make sure it was smooth
Then with the lid, I use Rusty Paper paint and a little bit of the Dark Chocolate Impasto to make the lid look old and warn like it's been left in the weather for years 
I had some IOD moulds from Prima I had made up with paper clay that I glued down with the Super-Tac Glue which I also painted with the Impasto 
I tried to make sure I painted each layer as I added them so I wasn't trying to get paint etc into grooves later
This ornate chipboard frame from Memory Maze I glued with the 450 Quick Dry Adhesive - I so stuck everything else with this as I'm impatient and hate waiting and this dries pretty quick
I also painted it in the Rusty Paper Paint
Unfortunately, this photo is a bit blurry and I didn't realise till I was finished but you get the idea I added some lace to the side 
This is where I embellish the box adding Prima flowers
A Frank Garcia Hardware spoon in pink I just love these and the Mermaid Beads are the perfect colour to match
Under the spoon is a piece of Prima lace which is a lace flower which I also cut another one in half and added in two places
I went over the lid with Mint Sparkle Art Alchemy Wax by Finnabair and the paper clay borders and the frame
Then I went over it with my favourite wax Opal Magic Vintage Silk by Finnabair
I love to mix a couple of the waxes together


Helmar Products I used

Thank you for visiting and I hope you come back soon x

20/05/2019

Earth Angels for Colour Blast


Hey Everyone
On the blog today I'm sharing a layout I created for a friend of her gorgeous granddaughter and one of her son's (he's also my godson) 
He's a massive Great Dane but as you can see he's a gentle giant and loves everyone as the little one has grown up she's pulled his ears sat on him done all sorts of things and he's just taken it all


Make sure to check out the rest of the Colour Blast Blog for great inspiration from the rest of the team and also check out the Facebook pages for the Kit Club and what's happening with that Design Team as well

So I used a page from the Limited Edition- Uniqueness as I like the muted colours in it but it has the slightly darker edges for the pop of colour
I've been playing with moulds a lot lately  and thought I'd try the Colour Paste in it I did the bling in a different mould and it came out perfect so I thought I would try Steel in this one as I like the lace look
So with my palette knife I spread a layer to cover the whole mould and made sure there was no parts left that you could see that had dips in it or see any of the pink under neath - it was hard to get it to not fill in where the lace parts shouldn't be 
I let it sit overnight so that way I was sure it was dry but before taking it out I used a cutting knife very carefully to take off any pieces that I could see that shouldn't be on there - like in the holes of the lace of course you can't get it perfect but I think it came out pretty good (this mould is used for cake decorating and they have the fondant that sets hard and comes out perfect)
After attaching all my paper pieces where I wanted them I glued the Colour Paste Lace down with Helmar 450 quick dry Adhesive and then added some Mermaid Beads to it for an added dimension
Here you can see some of the different pieces of paper I cut out of the Spread Your Wings - Wing it paper and the Spread Your Wings Elegant Tags 

These green Prima flowers were the perfect colour to go with this paper range and I always need flowers 


Colour Blast Products I used


Thank you for visiting and I hope you will come back soon x

08/01/2019

Wonder for Memory Maze


Hey Everyone 

I hope you have had a great start to the new year
Here's my first project for the Memory Maze Blog for this year
Also make sure you check out the rest of the blog or our 
Facebook page for all the latest updates and 
Design Team creations

I started with a canvas that I used in reverse I like to have some depth sometimes without having to build things up
I painted the canvas with black gesso

Then used the River Pebbles Stencil with modelling paste on the background 
Once the paste was dry I painted over that with the gesso as well

I painted Small Chicken WireBorder 2 Flourish. metal embellishments and Art Pebbles with the black gesso 
I left the flowers, the arrow from Charms Creations and the brown Mermaid Beads as they were so there was so more contrast

With the Deer I used modelling paste with the Mini Flower Stencil 
Then I used Dark Chocolate Impasto mixed with a little White Impasto 
Once everything was dry I rubbed some Finnabair Rich Copper Wax over the raised areas

I used Lucky Emereald on the leaves and then Mystic Turquoise and the Lucky Emerald on the flowers and the 


Small Chicken Wire as well as some Vintage Gold which is what I used on all the metal embellishments
And around the edge of the canvas I rubbed a bit of each colour except the Fire Ruby


The Art Pebbles I used a mix of Fire Rube and Vintage Gold

Products I used from Memory Maze -


Deer Head


Thank you for visiting and I hope you come back soon x


05/11/2018

Roses for Colour Blast


Hey Everyone

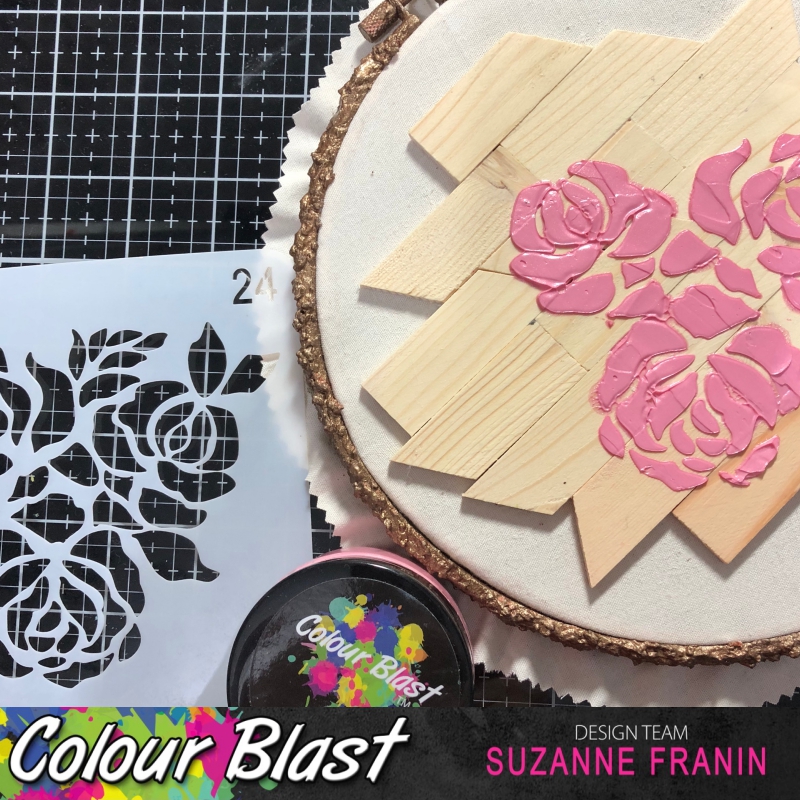
So for my creation this week for the Colour Blast blog I decided to try something out on a hoop I made my own gritty texture paste and I wanted it to be rusty 


I made a mix of decorative stones which are tiny stones, texture powder and impasto making sure it was mixed completelyI then went around the side and one edge of the outer hoop as the inside hoop would be covered by the calico


I then used Colour Artist Ink Rust and Colour Shimmer Spray Leather mixing them as I went to try and get the colour I was after but it didn't turn out how I wanted


So I made a mix of of Colour Mica Powder Espresso and some Gem Stone Glue from Helmar so the shimmer would stay instead of using clear gesso which takes the shimmer away


Then I used some of my large collection of the timber from the backs of the canvases (I collect them all they come in handy for all sorts of things) and arranged them into this pattern which isn't really anything


I then used Colour Paste Blush with a Rose stencil on the timber pieces (I wasn't sure how it would work but I like it)


I love when you use the colour pastes how the colours change when they dry


I then added a sprig of flowers that has some birds on it as well


Then I added some metal embellishments for a contrast colour and a different texture


Can't go past some Bling from Memory Maze


And these gorgeous Mermaid Balls that my mum gave me I have so many different colours in them they are so pretty


This is a side view of the hoop so you can see the texture


And another so you can see the shimmer of the Colour Mica Powder


Thank you for visiting and I hope you will come back soon x