Showing posts with label material. Show all posts

17/07/2019

Hello for Random Arts


Hey Everyone

Here's my latest project for Random Arts a little canvas of such a cutie - she's my friend's granddaughter  
Make sure you check out the BLOG for lots of inspiration from the rest of the team and don't forget to visit our Facebook Page and enter our monthly challenge
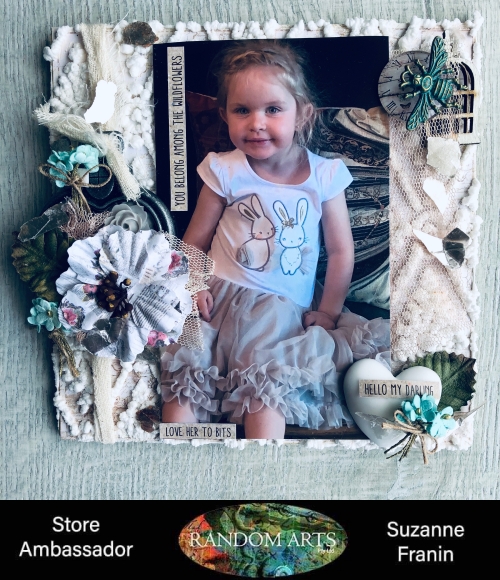

I used an Art Alternatives Wood 6 x 6 Panel and used some Prima 6 x 6 Paper Pad Jodie Lee Butterfly Collection which I used some Helmar Super-Tac Glue spreading it all over evenly so it didn't leave any bubbles

This is awesome Embossing paste - you have to heat it and when you do it puffs up the longer you heat it the more puffed up it gets

I added the little Bee Charm A Patina on top of the cabochon and birdcage for extra dimension
 I randomly added some of the Little Birdie Arctic Ice flowers for a pop of colour 
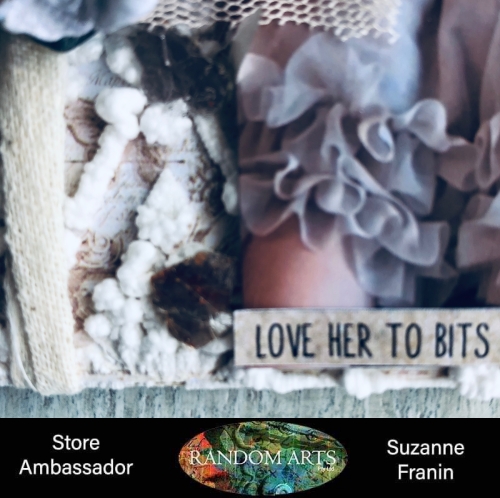
 I used some of the Tim Holtz word stickers to describe this gorgeous little girl
I used the large one and filled it with some material and flowers
 I glued it on top of some material that I tied in a knot and threaded the knot through the top of the locket
Adding some Little Birdie Mica Flakes in Silver randomly around the canvas  
I added the Resin Heart to the corner for balance
The resin looks so good,  they come out so clean from the moulds


Products from the Store

Mica Flakes Silver


Thank you for visiting and I hope you come back soon x

28/05/2019

Gift Box for Helmar


Hey Everyone


My project for the Helmar Blog is a gift box made from a box that had a mug in it (I think it was a Father's Day Mug)

Make sure you check out the whole blog for the rest of the Design team projects they areas creative I'm sure you will find something you will need to make 

This is the top view as it's hard to take a view of the whole box but I really only decorated the top other than adding material to the bottom which you will see next
I painted the box with Dark Chocolate Impasto from Finnabair 
I used the Fabric Glue and an old gift card to smooth it out so there was no creases or bubbles
I also went over the box as I did each side with the clean side of the card to make sure it was smooth
Then with the lid, I use Rusty Paper paint and a little bit of the Dark Chocolate Impasto to make the lid look old and warn like it's been left in the weather for years 
I had some IOD moulds from Prima I had made up with paper clay that I glued down with the Super-Tac Glue which I also painted with the Impasto 
I tried to make sure I painted each layer as I added them so I wasn't trying to get paint etc into grooves later
This ornate chipboard frame from Memory Maze I glued with the 450 Quick Dry Adhesive - I so stuck everything else with this as I'm impatient and hate waiting and this dries pretty quick
I also painted it in the Rusty Paper Paint
Unfortunately, this photo is a bit blurry and I didn't realise till I was finished but you get the idea I added some lace to the side 
This is where I embellish the box adding Prima flowers
A Frank Garcia Hardware spoon in pink I just love these and the Mermaid Beads are the perfect colour to match
Under the spoon is a piece of Prima lace which is a lace flower which I also cut another one in half and added in two places
I went over the lid with Mint Sparkle Art Alchemy Wax by Finnabair and the paper clay borders and the frame
Then I went over it with my favourite wax Opal Magic Vintage Silk by Finnabair
I love to mix a couple of the waxes together


Helmar Products I used

Thank you for visiting and I hope you come back soon x

08/10/2018

I am me for Colour Blast


Hey Everyone

This project for Colour Blast was made for a new friend for a reminder of where she has come from and where she has been in her life 

Make sure you visit the Colour Blast Blog and discover what fabulous creations have been made over there lately 


So I started of by painting everything with the Colour Blast White Gesso to give everything a nice even surface to work on
I then mixed in some Colour Mica Powder Espresso with some clear gesso too make a nice shimmery colour for the frame and some of the embellishments 
It's a shame the camera doesn't pick up the shimmer
Tip - Make sure to put the powder in first that way you won't get the dust floating up as you mix it together


Then on a few of my embellishments that I used the Colour Mica powder mix on I added Colour Embossing Powders - Bling and Sienna just a little sprinkle on them for some contrast


On the Memory Maze Ladies form with decorative wings I added the Bling so it would stand out and then used some Colour Artist Ink in Slipper which I also added to a few of the other embellishments to brighten up the piece


On the background of the frame I glued some material using the Helmar Super-Tac Glue it's a good strong glue and keeps things in place for ever 
I then too some Colour Artist Inks in Soot and Rust and added them to the background spraying water as I went until I was happy with the colours


Then the fun begins arranging everything I placed a sheer piece of fabric in the back under all the flowers to soften things 
I thought I'd use yellow flowers as it's such a happy colour and the quote is quite heavy and deep and then the little pink paper clay embellishments scattered I think add a bit of fun 


Thank you for visiting and I hope you will come back soon x