Showing posts with label glue. Show all posts

13/03/2019

Loved for Helmar


Hey Everyone

This week on the Helmar Blog I've created a photo board of my friends fur babies


Dogs (10)

Make sure to check out the rest of the blog for some great ideas and handy hints on what else you can do with your Helmar Glue 

Dogs (9)
I started of with a timber frame that came in two pieces 
Dogs (3)
Then used white gesso to cover the top part only as the base will be filled with the photos

Dogs (8)
I then used Art Alchemy Acrylic Paint Rustic Brown around the frame
Dogs (5)
I drew around the inside of the frame so I knew where to put my photos it also helped with sizing of my photos
Dogs (8)
I used the Acid Free Glue as I was sticking photos down
Dogs (7)

Dogs (8)


Dogs (9)
To glue the frame to the board I used Super-Tac Glue as this one hold just about anything together I also used it to glue my embellishments down
The Super-Tac Glue comes out white but dries clear so you have no evidence of the glue afterwards
 Dogs (11)
I was given the dog tags which was perfect for this project - I had to add but totally loved because these dogs certainly art
Each of the four dogs has a metal paw charm on thier photo for something special

Dogs (11)
This is Le Til she's the only girl amoungst the the four so I had to make sure she had a bow and a flower
Dogs (11)
This photo is of Roland when he was only about 8 - 10 weeks old he was so little
Dogs (11)
This is Vincent when he was a puppy if you look at the photos he's the biggest of them all now


Thank you for visiting I hope you come back soon x

28/01/2019

Fly for Colour Blast


Hey Everyone

Here's a little project I did using the Colour Blast Colour Pastes 

Make sure you visit the Colour Blast Blog and see all the awesome creations from the Design Team and look out for all the new products that are coming out
And don't forget we have a Colour Blast Kit Club make sure to check that out as well


I started by using the Heavy White Gesso on this timber frame giving it a good coat


I used the Colour Paste in Sunshine, Tangerine Dream and Blush trying to blend each one after the other (not that successfully but I think it still looks good) through this flourish stencil


After the paste was dry I used the string to wrap around the frame in every angle I could go 


I painted some paper clay leaves with some Colour Shimmer Cube Apple of Eye (are no longer available but you might find some online stores still stock them)


I just got this Colour Spray Carribean and it's so nice- it has a matte finish but it still pops 
I sprayed it onto this paper clay filigree 
I love the way it was depth it went into the grooves and stayed darker
I then stuck the quote onto it 


Added a few different flowers I think then end one is Prima and the other two are Little Birdie Crafts
You can see the paper clay leaves sticking out of the sides of the flowers  


The butterfly was a photo I found on the internet and just loved it I printed it out then fussy cut around all the white it had
I folded the wings up so it looks like it was flying


I then glued the butterfly to a metal ring that has flowers all the way around


I love this flower from Little Birdie with the Smile cabochon in the middle so I made the butterfly fly to that and used some metal leaves off to the side
   

Thank you for visiting and I hope you come back soon x

29/11/2018

Book Cover for Memory Maze


Hey Everyone 

My turn on the Memory Maze blog today and I thought I'd decorate the front of a book I got cheap out shopping the other day

Make sure you check out the rest of the blog for great inspiration from the Design Team and see what's new on the Memory Maze Website as the Boss seems to have a great imagination and brings new things out all the time


I'm not sure if I'll use this as a note book or as an Art Journal yet but I'm sure it will get used eventually 


I found this book in a store for $5


I then used black gesso with a roller it gave it such a smooth finish


In this corner I added a paper clay ceiling rose a metal piece and the Mini Frayed Edge Chiffon Rhinestone Flower Light Pink with a few little white flowers 
The pink chiffon flower is so pretty I could use it on everything LOL


I started buy putting the Scribble Frames Two and Embellishments down, I added a doily then added some straws that I cut at different lengths, I then put a silver metal circle under the Owl Swirly
I added the key to the side and some muslin to the other side 


I used some Pineapple Fusion I won from The Resin Rainbow it came with a whole bag of goodies then I added a paper clay ring of flowers over the top to make it look a bit like a wreath on a door with a little resin heart 
Along with the paper clay key hole
Then I added the Wrought Iron 30 to look like some iron work on the door

I added lots of the timber bits that you get with your canvases and then added one of the globes from the Globes set


I used a metal that had diamonds around the edge and added some flowers along with some Mermaid Beads


I had some of the Chicken Wire Small I cut it into two pieces and used it in two of the corners of the book
I used a metal corner and added a glass bead as well as some Mermaid Beads and some Diamond Gems


I love flair buttons and this one is from Flutterby Designs
The little camera was from The Resin Rainbow as well
I went around and added bling and Mermaid beads where I thought they were needed 

Then I used some Finnabair Art Alchemy acrylic paint that's gone a bit thick- I used my finger, so I rubbed it over everything then I used some Colour Blast Colour Shimmer Dust in Lollipop that I have made up in a bottle with water spraying as I went till I was happy with the finish
And I glued everything down with Helmar Premium Craft Glue

I had a tassel so I attached some string so I could use it to mark what page I was up to in the book

Memory Maze products I used -


Thank you for visiting and I hope you will come back soon x

24/11/2018

Best Buddies for Memory Maze


Hey Everyone

My project this week for the Memory Maze Blog is a layout of  a photo from my son's 18th Birthday Party
These are his close mates that he's gone to school with 
Two from Primary School and the other was from High School which they all went too


I started of by using the  Lots of Squares Stencil with the Finnabair Graphite Texture Paste


I raised the photo up with some cardboard and glued it with the Helmar Acid free glue the rest of the chipboard I used the Helmar Tacky Craft Glue
On the Best Buddies I used Finnabair Metallique Wax in Old Silver but then went over it with Fire Ruby because the words didn't stand out enough


On all the Cogs and Pulleys12 x 12 All there is is Cogs for everything and the Clock Face I used the Finnabair Metallique Old Silver Wax
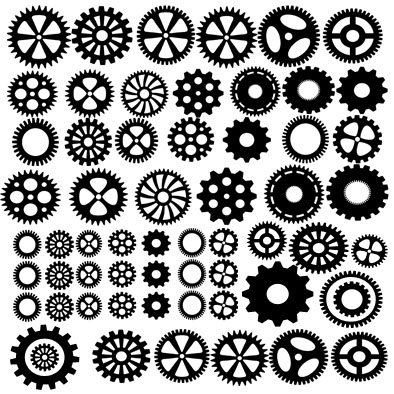
I love how silver it is the chipboard actually looks like metal


Memory Maze products I used - 


Thank you for visiting and I hope you will come back soon x